Part 1: Create the CCS v4 project from the hello world template
- These steps assume that you have correctly installed and configured CCS v4. You should be able to connect to the DSK and see something like the following window before proceeding.

- Click on "File->New->CCS Project". If this is the first time using CCS v4, you may have to click "File->New->Other" and then select CCS project. The following window should appear
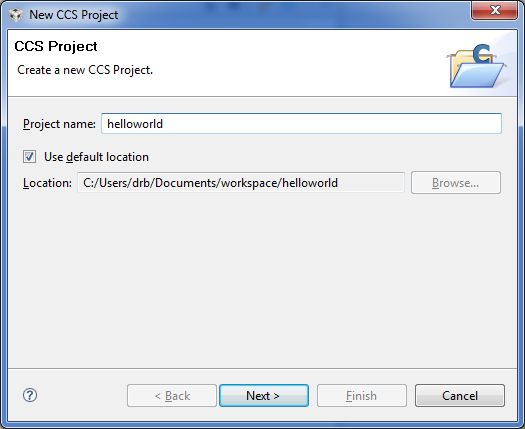
This is where you name your project and choose a location for it. Here we are naming the project "helloworld" and we are storing it in the default location. Click on "Next".
-
Now you need to select the type of project. Remember, CCS v4 can be used with lots of different targets, so we need to be explicit about the type of project.

In the Project Type pulldown, select "C6000". Leave the "Debug" and "Release" check boxes ticked. Click "Next".
-
Now you have the opportunity to reference other projects.

We don't have any other projects, so just click "Next".
-
Now you need to configure the project settings.
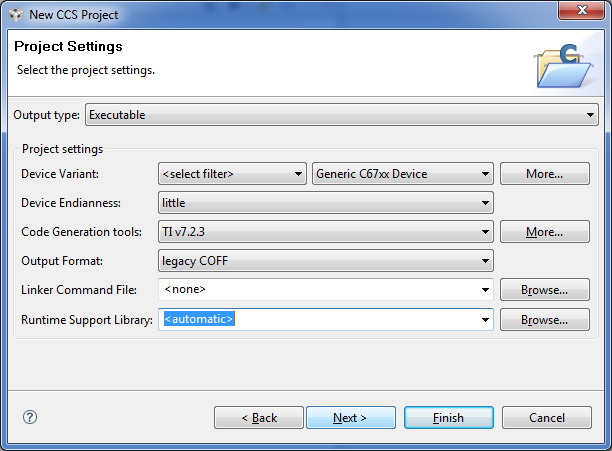
The "Output Type" should be "Executable". The "Device Variant" should be "Generic C67xx Device". The "Device Endianness" should be "little". Just go with the defaults on the "Code Generation Tools", "Output Format", and "Runtime Support Library". Do not click "Finish"! Instead, click "Next".
-
Now you have the opportunity to select a project template.
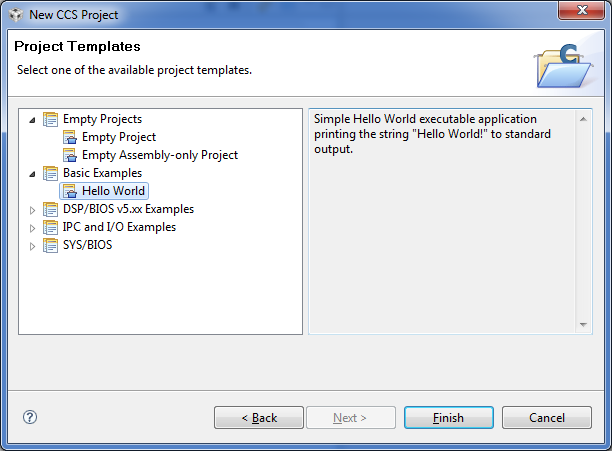
Under "Basic Examples", select "Hello World" and then click "Finish".
-
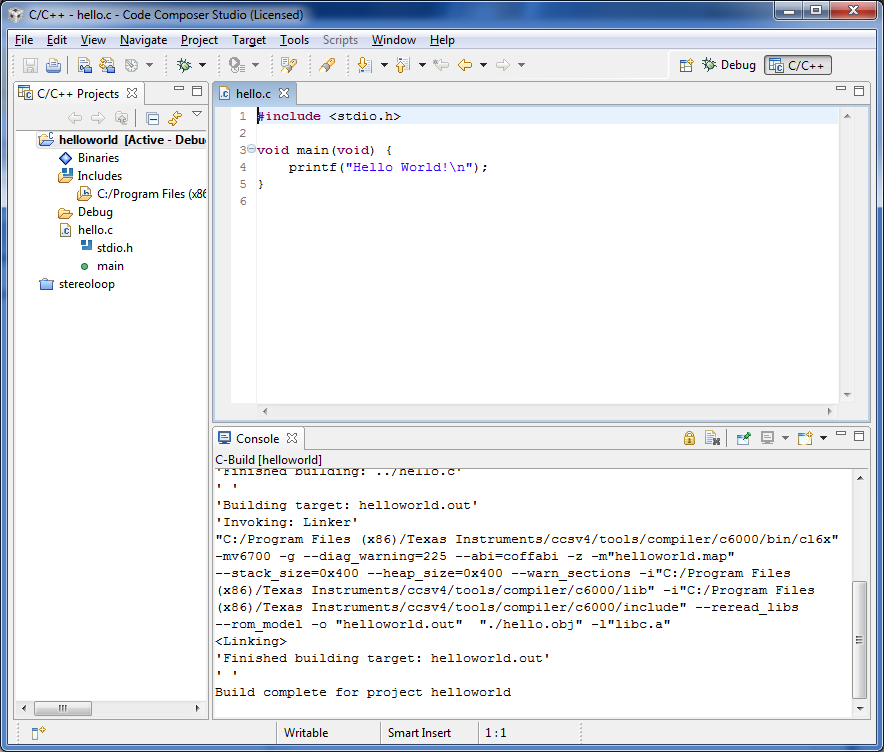
This is what it should look like after you've set up the project.
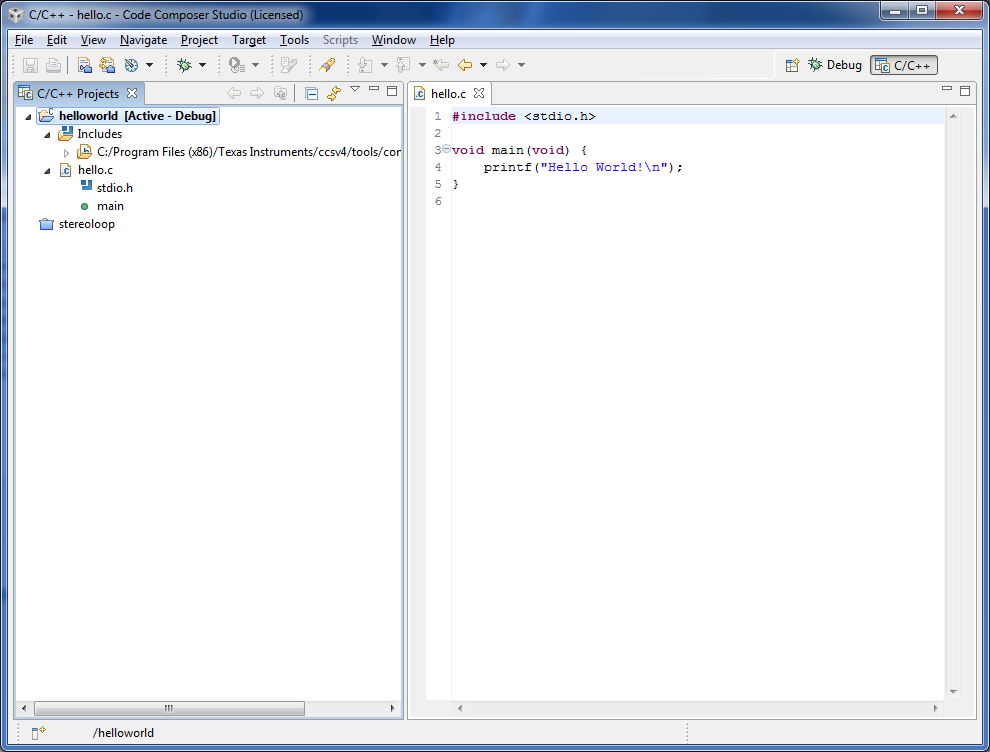
You might have some other panels visible, but the C/C++ Projects panel should show the helloworld project as "Active".
Part 2: Build and run the project
- If you've followed all of the steps above, you should be able to build the project and run it on the DSK. Click on "Project->Build Active Project". You should see something like this:
-
If you get some warnings about the stack and heap sizes, click on "Project->Properties" and select the "C/C++ Build" section in the left sidebar.

-
In the "Tool Settings" tab, under the "C6000 Linker" heading, select "Basic Options"

Put in values of 0x400 for stack size and 0x400 for heap size (these should be fine for ECE4703 projects). Click "Apply" and then click "OK".
- Click the "Debug Launch" button. This will cause the executable output of the build to be loaded onto the DSK and put the instruction pointer of the DSP at the start of your code. In the Debug window, press the Run button.
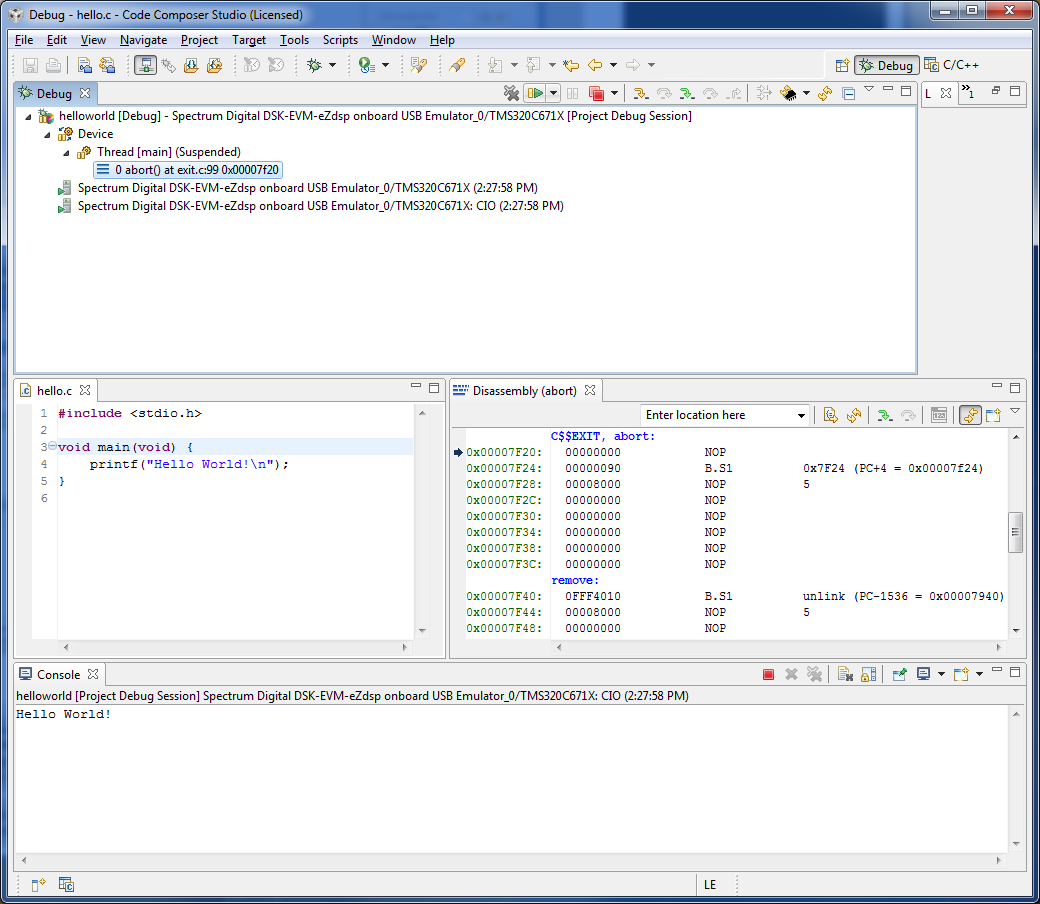
You should see "Hello World" in the console.
- Congratulations. You've successfully built and run a project on the TMS320C6713 DSK.


